Table of Contents
Shipping
Introduction
You can use FastManager's integrated shipping module to ship packages via UPS.
Advantages of Integrated Shipping:
- No more double entry.
- The tracking number is stored in your work order.
- Your customer is automatically charged a shipping and handling fee based on your charge preferences.
- Drop ship made easier. Based on how a customer is setup you can have your customer's address populate as the “FROM” Address and have their customer's address populate the “TO” address.
- When charging your customer you can add a % markup to the ship charges plus add a handling fee as well as a handling fee per box.
- Track your shipment directly from FastManager. No need go to the UPS web site.
- FastManager's integrated UPS shipping supports package insurance as well as UPS notifications.
- Notification emails are sent to the email address on the sales order, the associated sales rep as well as a master address that you setup so you can have a copy of every UPS notification email.
- You can also print the UPS labels directly from FastManager. You can use your existing label printer or any standard laser or inkjet printer will also work.
- Your shipping employee does not have to see the invoice screen in order to ship. FastManager adds the ship charge in the background and he can ship directly from the job board.
- FastManager will automatically change your WO status and comment once the shipment is processed.
UPS Setup
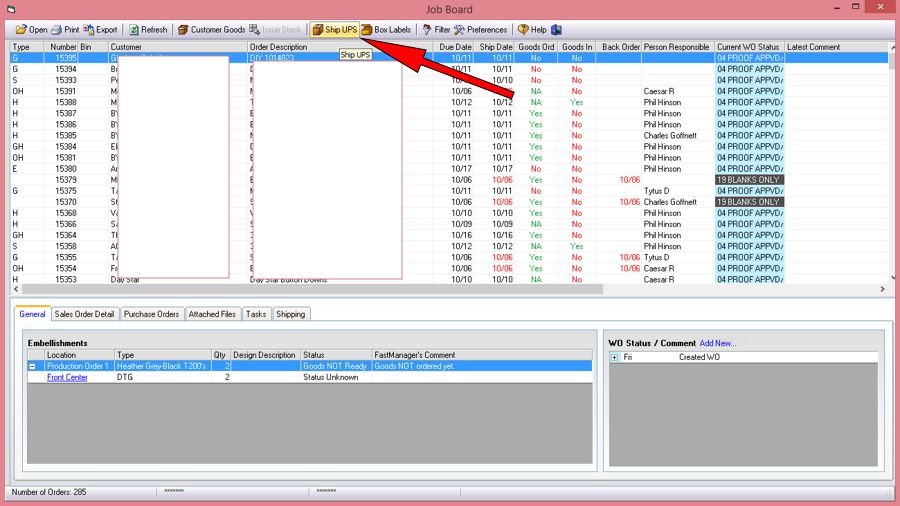
- Open the Job Board and select an order
- Click on Ship UPS
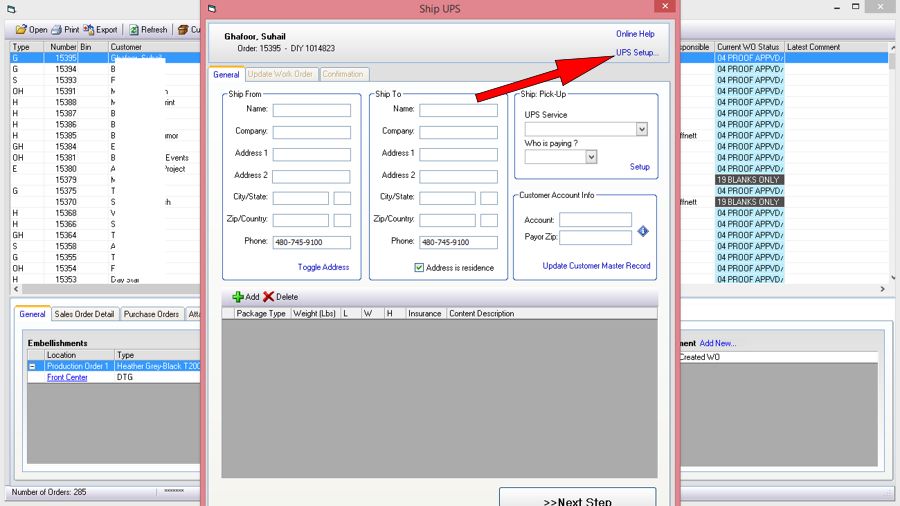
- In the UPS dialog that pops up, click on the
UPS Setuphyperlink
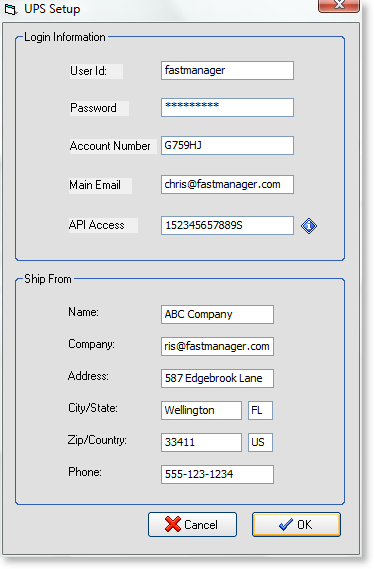
Enter your UPS account information.
- This will be your UPS web account id and password, you account number as well as your API Access Key that you can get from UPS.com
UPS API Access Key
API Access Key.This will not cost you anything and it only takes 5 minutes online. Here is how:
- Browse to ups.com/upsdeveloperkit/ and login and with your UPS.com user ID and password.
- Click on
Manage Access Keysin the Access and Administration section.

- Click on the
Request New Access Keyhyperlink at the bottom of the page:
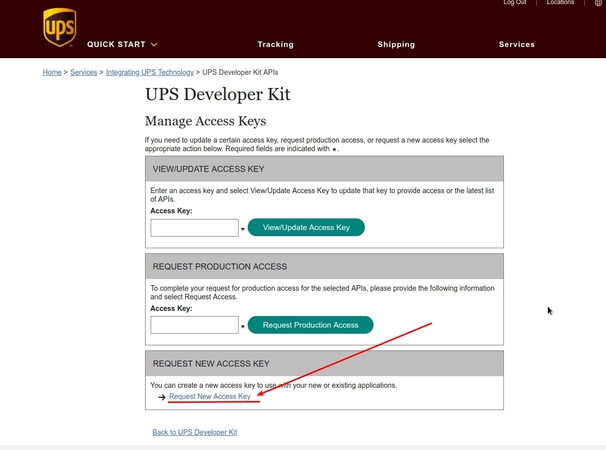
- Fill out the information and then click on
Request Access Keyat the bottom. This will generate a new access key that you can enter on the setup screen in FastManager.
This is not required for FastManager's module to work so you can ignore that step.
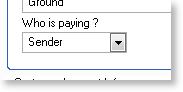
FastManager will only use your account if the Payor Type selected is Sender.
- Enter your company address. This is the FROM address that you want to use when you ship to your customers.
- When shipping you will be able to toggle between this address and your customer's address in the event that you need to drop ship the order to their customer.
UPS Ship Methods
To cross-match your current ship methods to those of UPS:
- From the Ship screen, under
Ship: Pickupyou can click on theSetuphyperlink. - Each ship method you currently have in FastManager can be cross matched to the UPS service type as well as who will be paying.
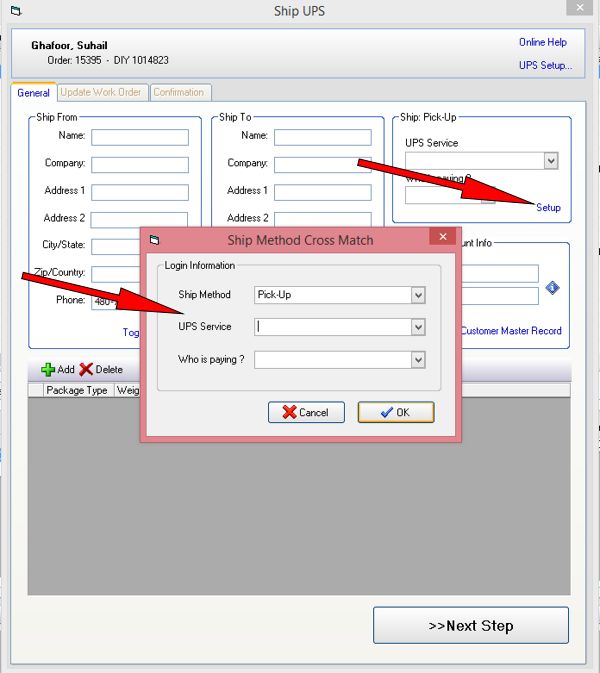
- UPS Ground, and
- UPS Ground 3rd Party
Ship UPS
To create a shipment go to the Job Board.
Select the WO order you need to ship.
Click on the Ship UPS button
If you dont have the ship module active then you will have the opportunity to purchase it directly from within FastManager.
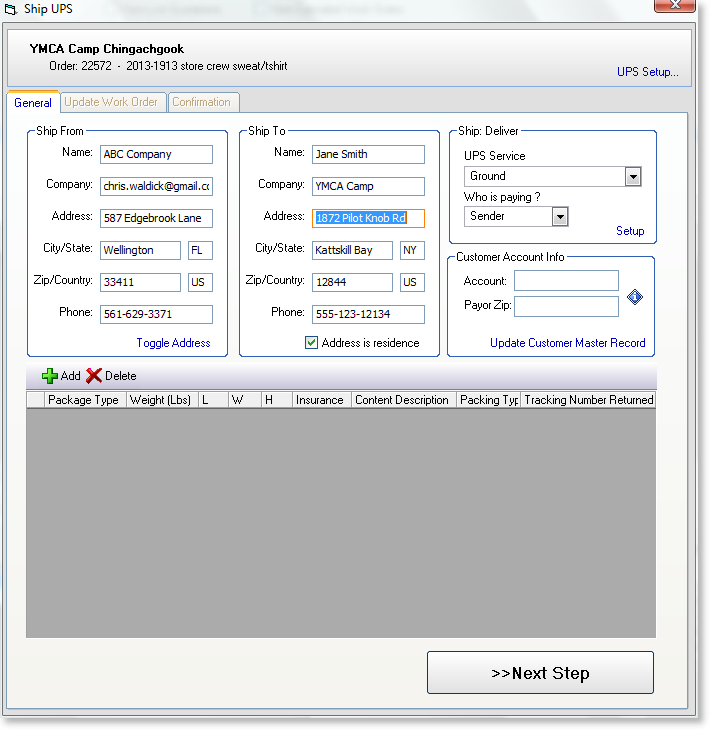
FastManager will select your address as the ship FROM if Who is paying = Sender
- If not, then FastManager will assume you want to drop ship to your customer and will select your Customer's address as the FROM address.
- You can still toggle between the addresses by clicking on the hyperlink below the address
FastManager will try and Parse the freeform addresses that your entered into the sales order or your customer's master address.
If you enter the address as follows then FastManager will seamlessly parse the address:
| Ship Address field on the Sales Screen: |
| —————————————– |
| COMPANY NAME |
| CONTACT PERSON |
| ADDRESS |
| BUILDING OR SUITE NUMBER (Optional) |
| CITY, STATE ZIP |
NY or FL.Use the country abbreviation such as
US
Next you can add how many boxes you have.
Click on the Add button.
Complete the information below
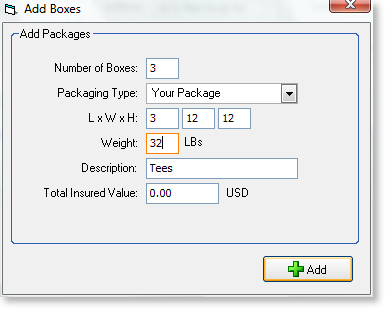
- You can add more boxes by clicking on the Add button again.
- You can delete mutiple boxes by highlighting many rows and then click on the Delete button.
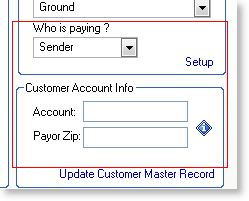
Payor Account Info
- If the
Payortype is notSender, you will also need to enter your payor's UPS account number and zip code
Click Next at the bottom of the screen
From this tab you have 2 sections that you need to complete:
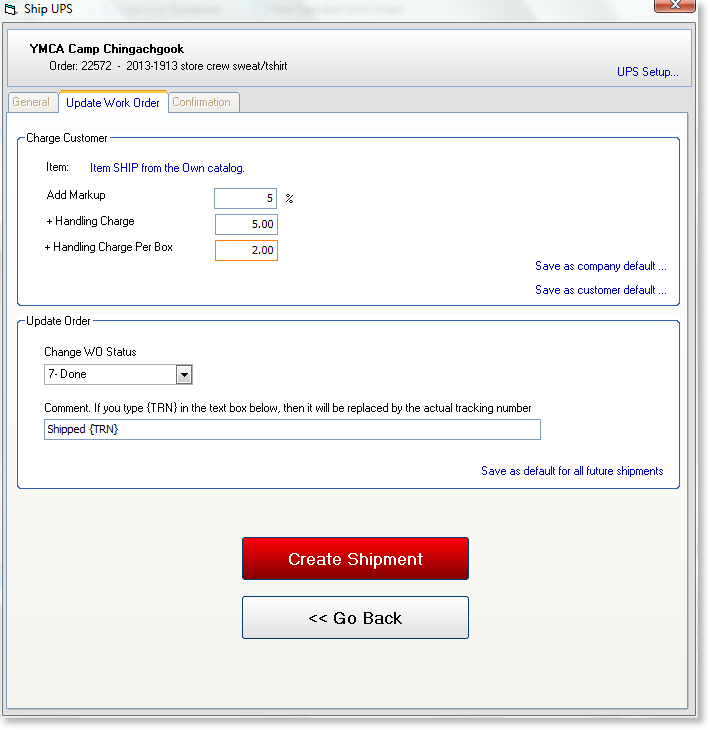
- First, select how your customer is billed for the shipment as well as the item code you want to use in the sales screen.
- To change the item code click on the hyperlink:
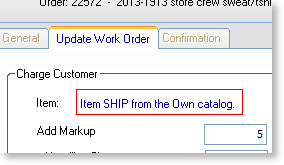
Sender.If the payor type is not sender then FastManager will still charge the handling fees.
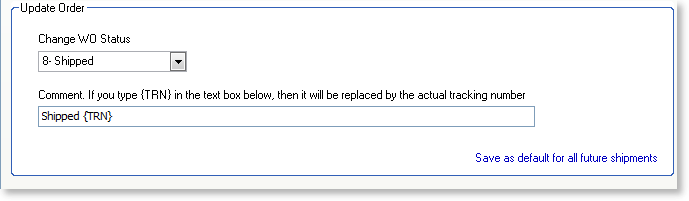
The next section is where you tell FastManager to update the WO status and make a comment.
- The text
{TRN}will automatically be replaced with the master tracking number that is sent to FastManager from UPS.
The markup and handling fees can be saved as a company default or customer default.
The customer default will supercede the company default. So if there is no default charge for your customer then the company default will apply.
- You can of course make all values zero.
Next click on the Create Shipment Link.
- This may take a few minutes while we connect to the UPS server.
Once completed you will see a summary of the shipment including the tracking number and all charges.
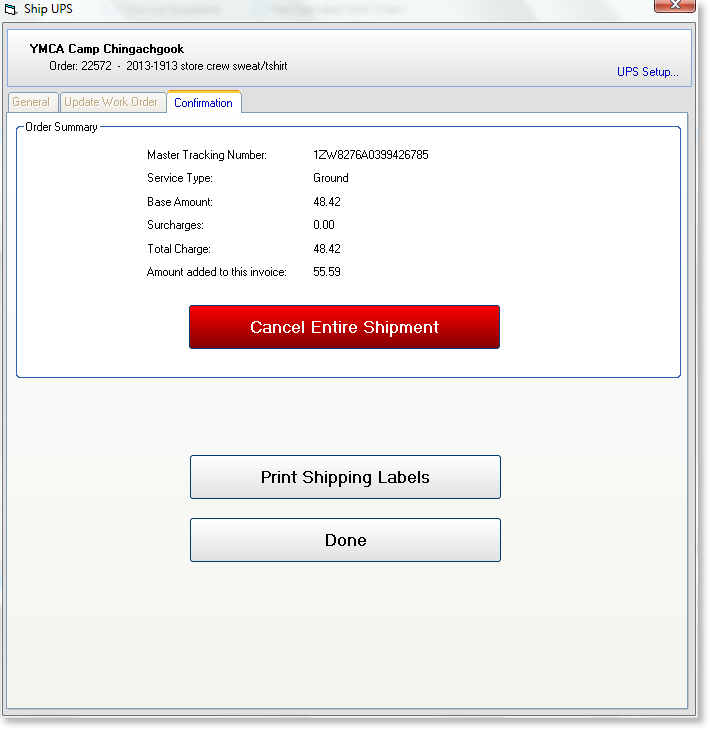
If you are not satified with the amounts you can select to Cancel the entire shipment at this time.
From here you can also select to print the shipping labels.
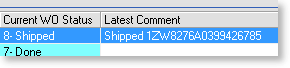
Once you are done, you will see that FastManager updated your WO status and comment
If you open the order on the Sales Screen, you will see that FastManager has added the charge as a new line item.

Printing Labels
Right after shipping you will have the opportunity to print the shipping labels .
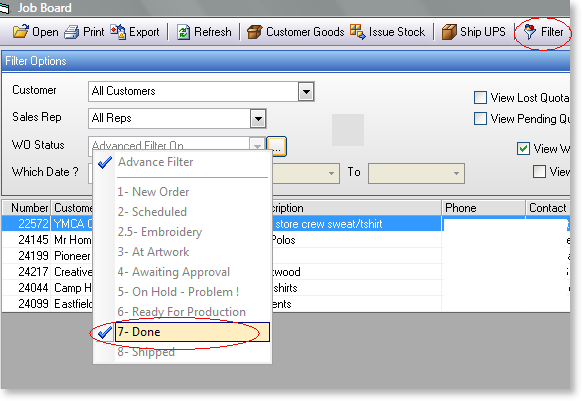
- If you made a mistake you can always re-print the labels from the Job Board, Sales Screen or Task Screen
- To re-print the labels from the Job Board, select the work and order and click on the
Shippingtab below.

- To re-print the labels from the Sales Screen, click on the Fast Action button and select
UPS Shipments.
- To re-print the labels from the Tasks Screen, click on the Action button and select
UPS Shipments
Select which printer you want to print from as well as the other settings that may be required.
You can print to almost any printer including, inkjet, laser and label printers.
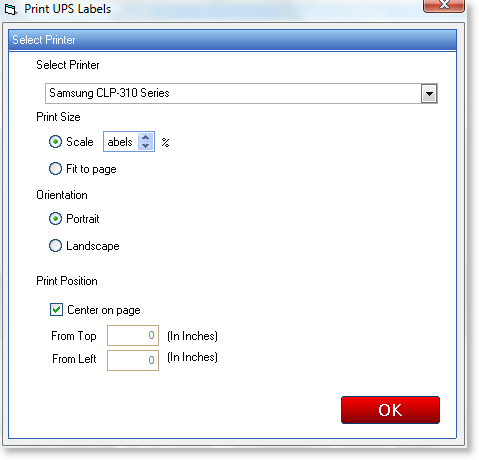
Once you click OK these settings will be saves to this computer ready for when you ship again.
You will see a grid with all the boxes listed.
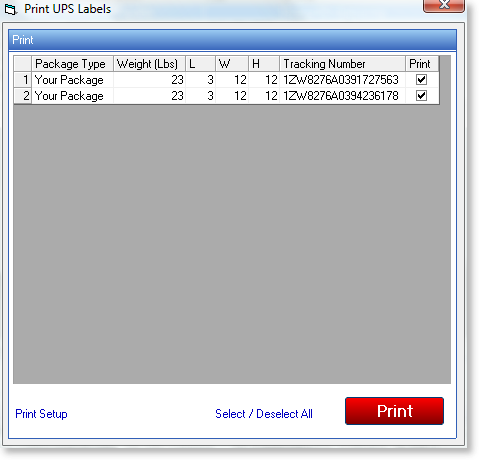
- By default all check boxes are checked.
- You can uncheck and only print the labels you want.
- At first you may only want to print 1 label until you have your setup 100% correct.
Print Setup hyperlink to go back to the previous page and then print another test label if required.
Click on Print.
Cancel UPS Shipment
After creating the shipment you will have an opportunity to cancel the entire shipment.
- You can also try and cancel later, however UPS will need to authorize the cancellation.
- Select the shipment you want to cancel.
- Click on the
Cancel Shipmentbutton
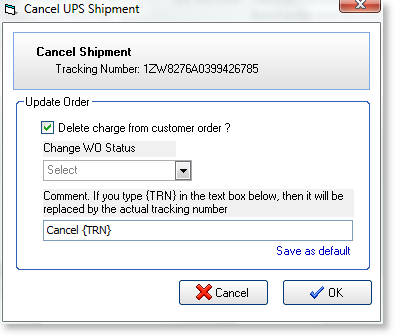
- You can also select if you want FastManager to remove the charge from the sales screen and change the WO status.
- FastManager will change the WO status as well.
{TRN} will be replaced with the master tracking number
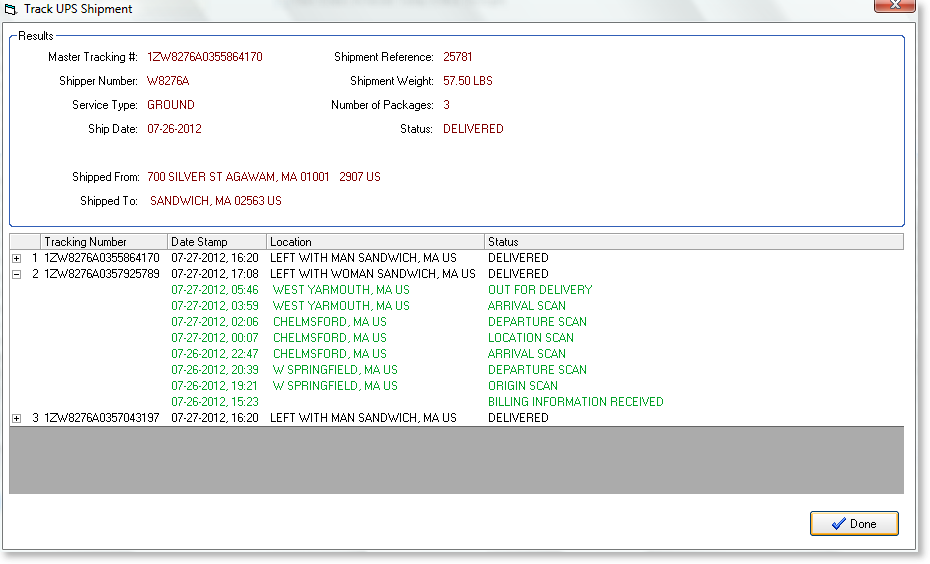
Track The Shipment
Similar to printing labels you can track your shipment from the Job Board, Sales Screen or Task Screen.
To track a shipment, select the Shipment you want to track from the Job Board
On the Ship UPS tab at the bottom, click on the Track button.
- It may take a few seconds while we connect to UPS to fetch the tracking info.
- FastManager will show you detailed results of the shipment.