Table of Contents
The Quickbooks Desktop Integrator
Installing the integrator
- FastManager's QuickBooks Integrator is a separate program which is automatically installed at the same time as FastManager
- If you already have FastMananager installed, look for the QuickBooks Integrator shortcut on your desktop:
Minimum requirements
- You need to have at least FastManager version 2014.75 installed to integrate with Quickbooks Desktop
- To use the Quickbooks Desktop Integrator, you need to have
QuickBooks PRO 2007or better installed. - You need to have QuickBooks open and logged into the correct company file while using the Integrator.
Getting Connected
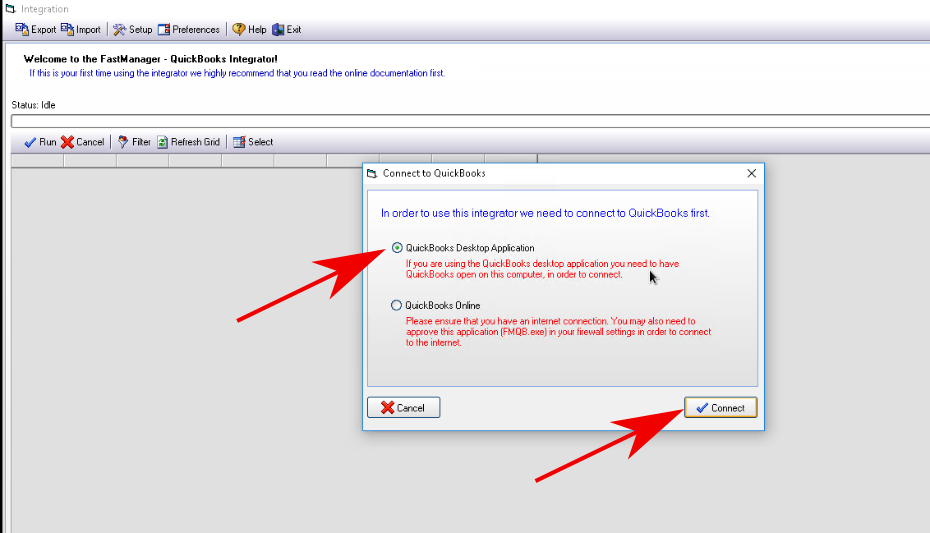
Ensure that QuickBooks Desktop is open on the computer where you want to use the integrator, then use the shortcut on your desktop to open the Integrator
- This is only necessary the first time you use the Integrator.
Select Quickbooks Desktop Application and click on Connect
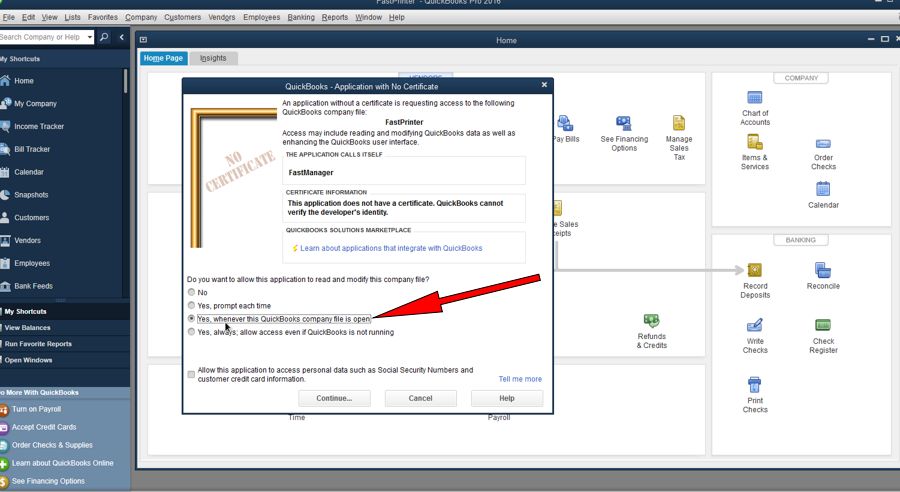
- If this is the first time you are connecting, QuickBooks will prompt you for permission if you are logged in as the administrator.
- From the QuickBooks permission screen, select
Yes, whenever this QuickBooks company file is open
- QuickBooks will prompt a second time to confirm if you are sure that you want this application to integrate.
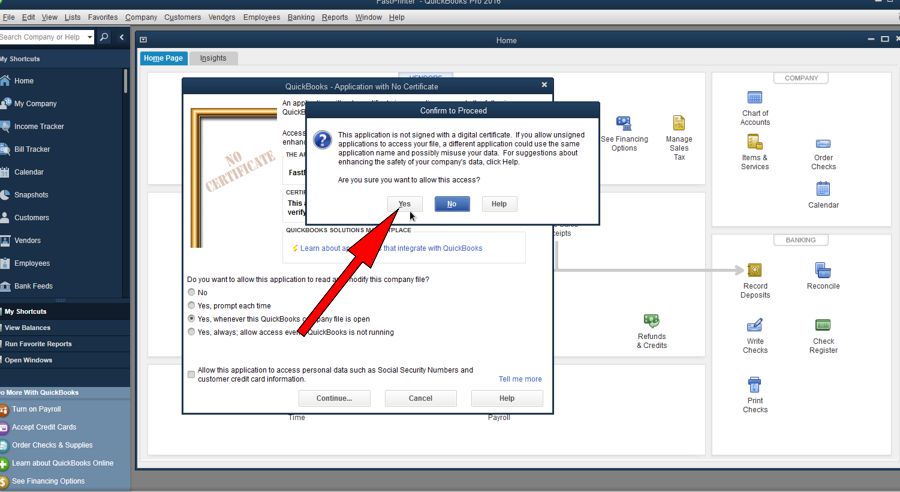
- Click on
YES - QuickBooks will show this confirmation screen telling you how to remove the company in future. Click on Done

- The Integrator will connect to the company file that is currently open in QuickBooks. That is why it is important that you have QuickBooks open when trying to integrate.
Setting up the Integrator
Once you are connected to Quickbooks, you will be presented with the Preferences and Setup screens, one at a time.
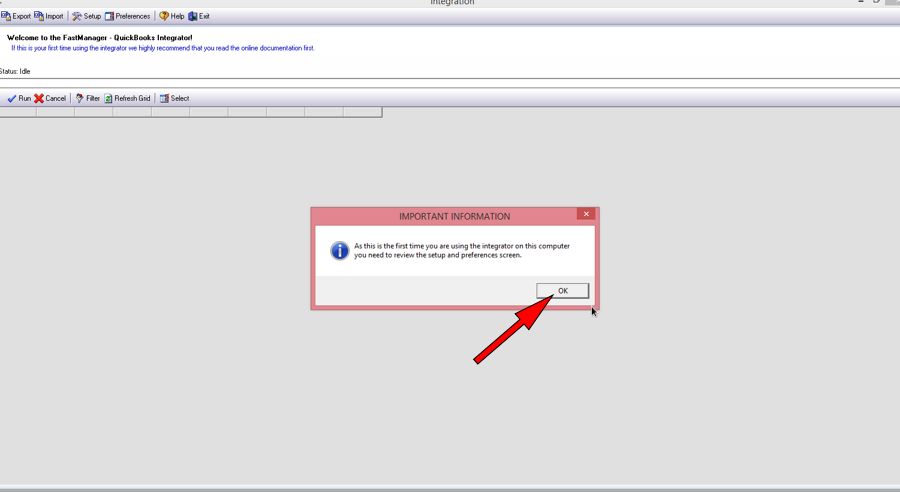
- This will only happen the first time that you run the Integrator. Once the Preferences and Setup have been done, you will no longer be prompted each time you open the Integrator.
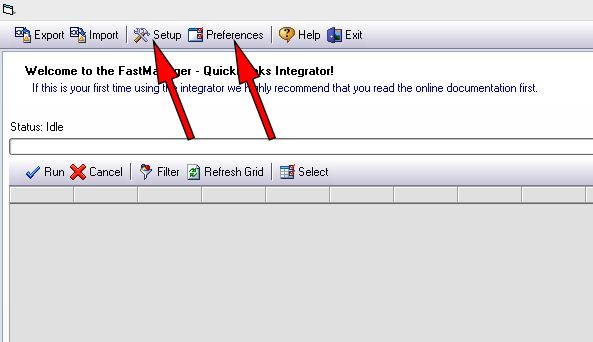
- However, if you want to view or edit any of the Preferences or Setup, you can just click on the appropriate button at the top of the Integrator window:
Preferences
To access the preferences area, you can click on the Preferences button.
The Preferences window has 4 tabs:
The General Tab
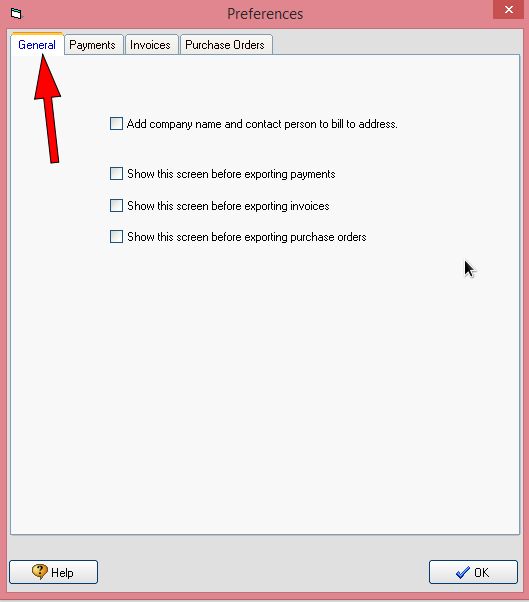
Add company name and contact person to bill to address- If this option is selected, then the Integrator will ADD the company name and contact person to the
Bill Tofield on the Invoice in Quickbooks - This option is only useful if preference is not already enabled in Quickbooks
Show this screen before exporting invoicesShow this screen before exporting paymentsShow this screen before exporting purchase orders- If any of these are selected, then this preferences screen will pop up (for review) just before the Invoices/Payments/PO's are exported
The Payments Tab
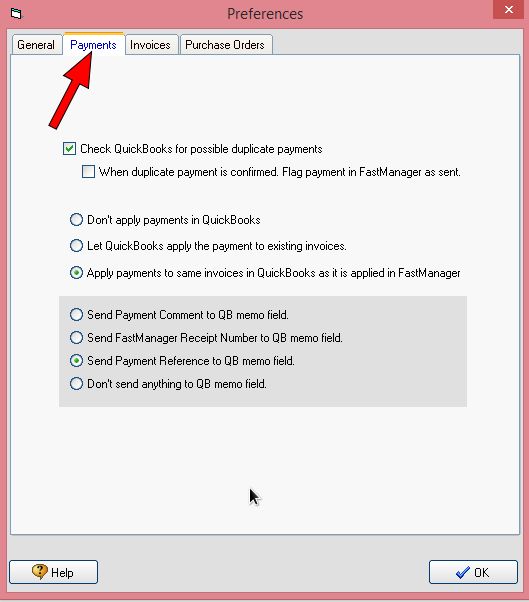
Select your preferences when exporting Payments to Quickbooks
- The most commonly selected preferences are indicated in the image above
Later, once the WIP is converted to an Invoice, that invoice can also be exported to Quickbooks and the payment (which is already in Quickbooks) will automatically be applied to the Invoice.
- This assumes that the preference:
Apply payments to the same invoice in Quickbooks as in FastManager has been selected
The Invoices Tab
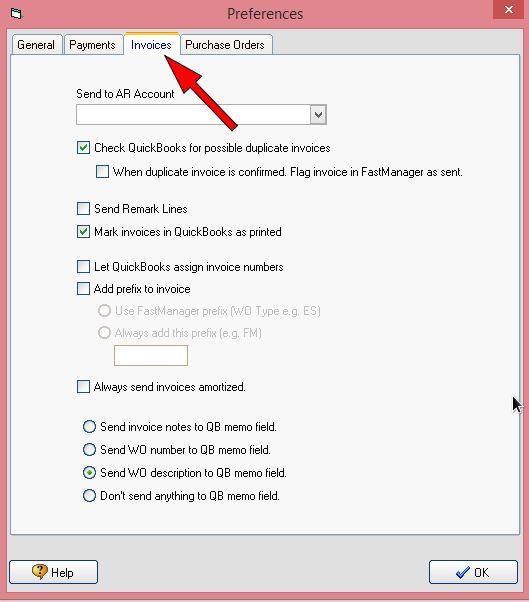
- Select your preferences when exporting Invoices to Quickbooks
- The most commonly selected preferences are indicated in the image above
If you select:
Let Quickbooks assign invoice numbers, then Quickbooks will give the Invoice a NEW NUMBER.Optionally, you may also have the Integrator ADD A PREFIX to the FastManager Order Number (the prefix will show up in front of the Invoice number in Quickbooks)
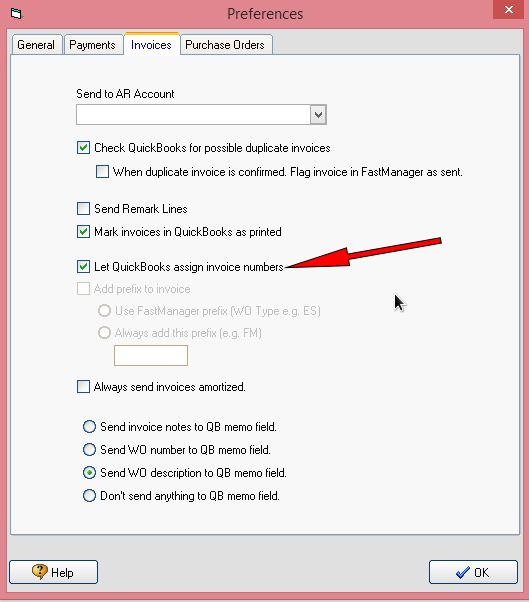
Always send invoices amortized- By default, all invoice lines are UNamortized when they get exported to Quickbooks. This is to split out the Sales Values for each different line item (such as Apparel / Embroidery / Setup charge / etc…)
- If you wish, you may keep the total sales value combined on the item line/s (which will leave the services and additional charge lines with ZERO sales value)
The Purchase Orders Tab
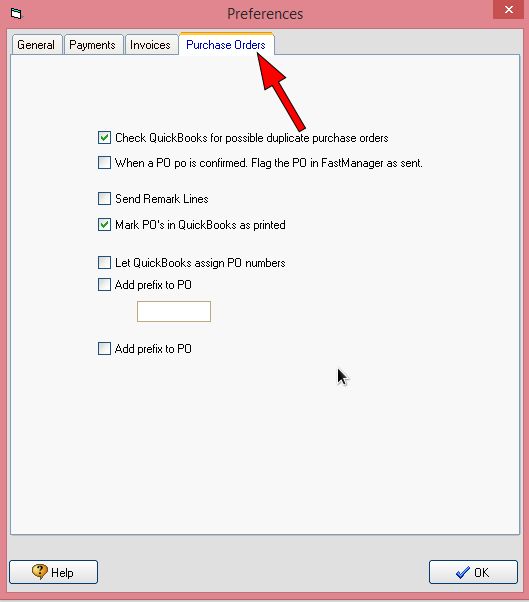
- Select your preferences when exporting Purchase Orders to Quickbooks
- The most commonly selected preferences are indicated in the image above
When you are done setting your Preferences, click on OK
Setup
- In order to exchange data with QuickBooks you need to cross match certain data fields in QuickBooks with those in FastManager.
- For example: The sales rep in FastManager might be
John Smithand the Sales Rep in QuickBooks could beJ Smith.- We will link these two reps together on the
Sales Repstab of the Integrator setup screen
- You only need to do the setup once. You only need to come back to the setup screen if you make changes to any of its values in either FastManager or QuickBooks.
- To access the setup area, you can click on the Setup button.
- You will see different tabs from where you can setup different values.
- On each one, there will be a list of options on the left, which are the values as they appear in FastManager and a corresponding list on the right, of the same types of items as they appear in Quickbooks
- From the drop-down selection on the right (“Quickbooks items”), select the appropriate value to map to the item listed on the left (the items from FastManager)
After you have created the new item in Quickbooks you will need to close and reopen the Integrator in order for the item/s in question to show up in the drop-down selection.
It might therefore be a good idea to review all the different tabs and compile a list of what is needed in Quickbooks, then go to Quickbooks and create ALL the missing items, then close and reopen the Integrator once in order for all the new items to show up.
This can reduce or remove the need to close and reopen the Integrator multiple times as new items are added to Quickbooks during the initial setup.
General Tab
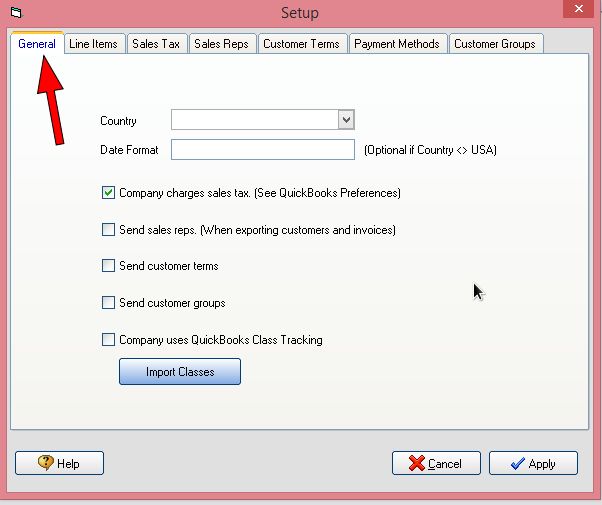
Country– Only required if the country is outside the USA.Date Format: Enter: dd-mm-yyyy (Only required if the country selected is something other than USA.)Company charges sales tax- In Quickbooks, go to
Edit -> Preferences -> Sales Tax -> Company Preferencesand check ifDo you charge sales tax?is set toYesorNo
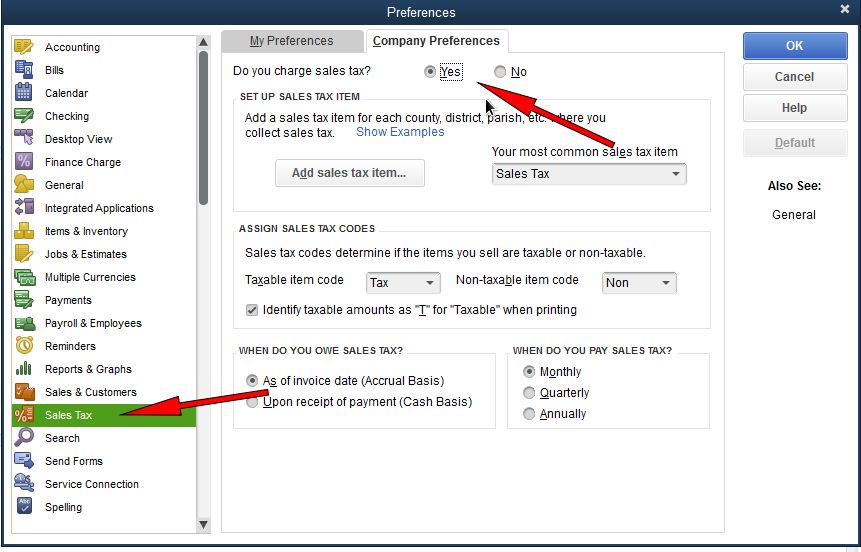
- If it is set to
Yes- check the box in the Integrator Setup- Leave the box unchecked if the setting in Quickbooks is
No
Line Items
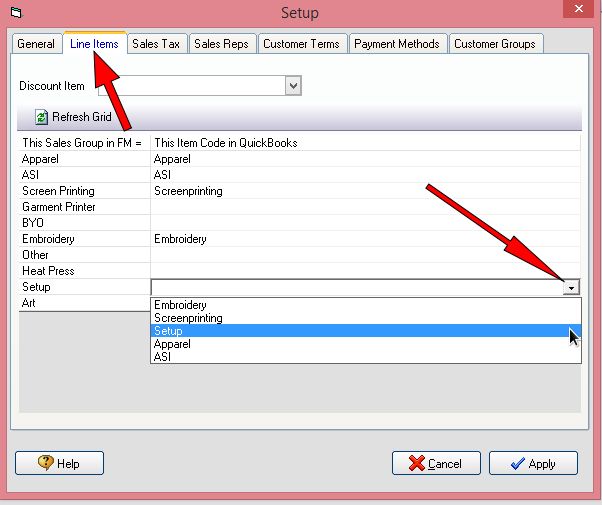
Every SALES GROUP in FastManager will link to a corresponding LINE ITEM CODE in Quickbooks.
On the left you will see a list of the existing Sales Groups in FastManager.
- From the drop-down selector on the right, under
This item code in Quickbooks, select the appropriate Quickbooks item code to link with the correpsonding Sales Group from FastManager
The Integrator will not show the list if there are too many items.
You may need to create new Line Items in Quickbooks.
- If necessary, in Quickbooks, go to
Lists -> Item Listand thenItems -> New Itemto create a new Line Item. - The new line item must NOT be of the type:
Inventory Part- If this is a physical item, such as an item that will correspond with the Sales Group called:
Apparel, then the best item type to use will beNon-inventory PartorOther Charge. - If this is a Service item, such as an item that will correspond with an embellishment like Screen Printing, then the best item type to use will be
ServiceorOther Charge. - If this is going to be the
Discountitem, then the only item to choose will be the type:Discount
Apparel).In other words, all the different vendor SKU's will end up under the same item code in Quickbooks.
Apparel or other physical goods, or for any items or services that you expect to include on any Purchase Order in FastManager: - in Quickbooks, when creating the item be sure to check the box: This item is used in assemblies. That will allow you to select both the Sales (Income) account as well as the Purchasing (“Cost of goods”) account.
Sales Tax
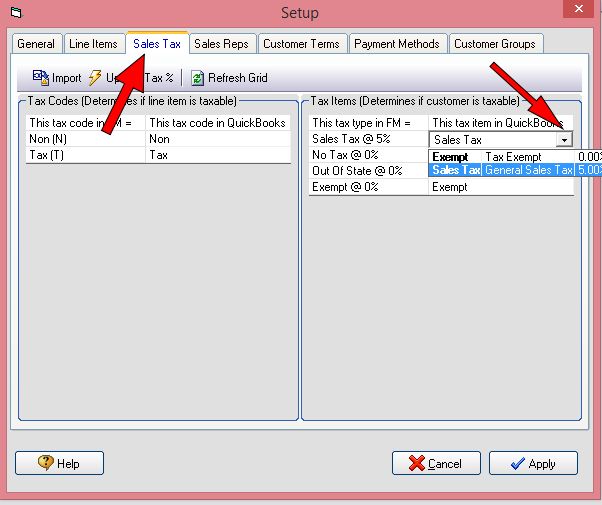
The Sales Tax tab is seperated into 2 sections: Tax Codes and Tax Items
- Tax Codes should never need to be changed
- These refer to each line item on an Invoice and indicates if the line item is (T)axable or (N)on-taxable
- Tax Items
- Refers to the tax item percentages in each program.
If the precentage/s ever change - make sure to change them in both programs!
Sales Reps
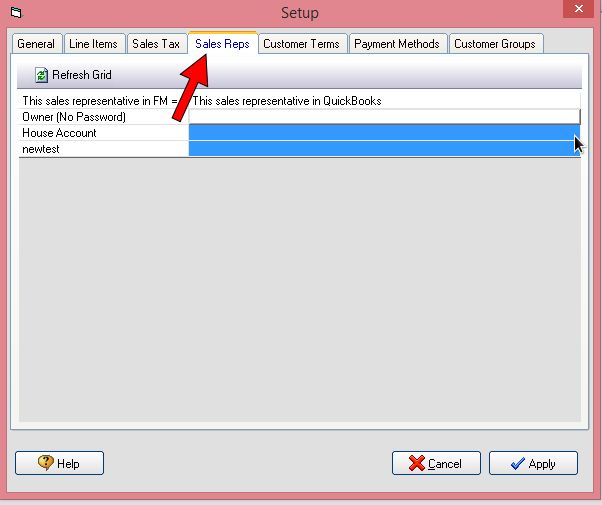
On the right hand side, select the Sales Rep from Quickbooks to correspond with the Sales Rep from FastManager.
- If the option:
Send Sales Reps, on theGeneraltab, is not checked, then this tab is unused
Customer Terms
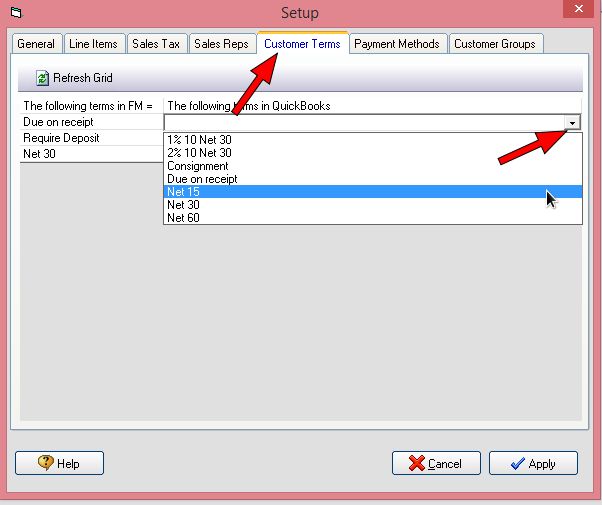
On the right hand side, select the “Customer Terms” from Quickbooks to correspond with the same from FastManager.
- If the option:
Send Customer Terms, on the General tab is not checked, then this tab is unused
Payment Methods
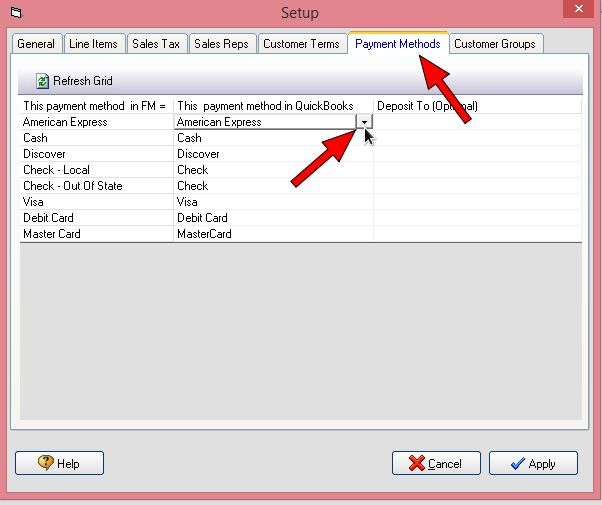
In the center column, select the Payment Method from Quickbooks to correspond with the same from FastManager.
Undeposited Funds account in Quickbooks.If necessary, in the
Deposit To column, you can select a different or specific banking or other “Current Asset” account in Quickbooks for payments in that particular payment method to be posted to directly.
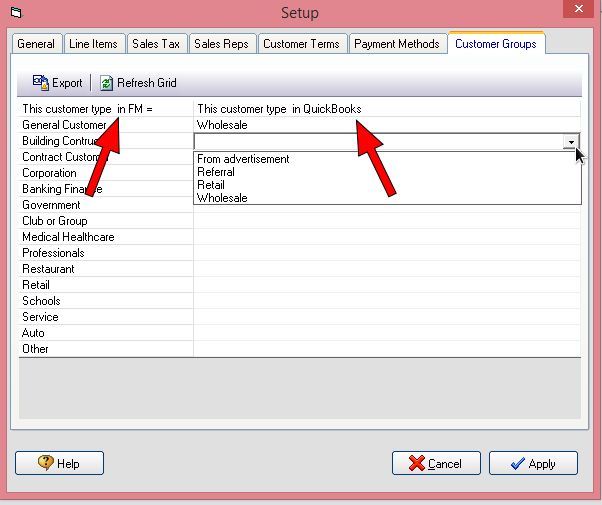
Customer Groups
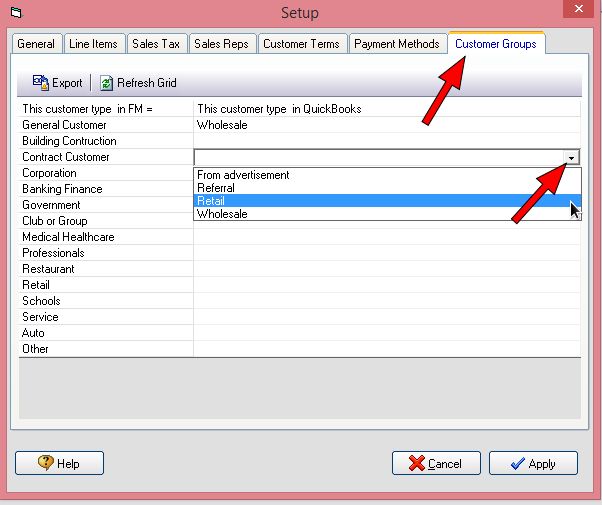
On the right hand side, select the Customer Type from Quickbooks to correspond with the Customer Group from FastManager.
- If the option:
Send Customer Groups, on the General tab, is not checked, then this tab is unused
Edit -> Lists -> Customer Industry
When you are done with the setup on each tab, click on Apply
If you do, select:
Yes, whenever this company file is open (as you did before)
That is all there is to setting up the integrator.
You only need to revisit this section if you make any changes in QuickBooks or FastManager that will effect the associated values.
Importing/Exporting Customers
It is a good idea to first EXPORT any existing customers from FastManager to Quickbooks
- In the Integrator, click on Export →
Customers- The Integrator will build a list of all the customers in FastManager

- You can uncheck the box next to any customer/s that you do NOT want to export to Quickbooks at this time
- Then click on Run to begin the export
!!! note If the customer already exists in Quickbooks you will be prompted with the option to link the customer or cancel the export
You should also IMPORT any existing customers from Quickbooks to FastManager:
- In the Integrator, click on Import →
Customers- The Integrator will build a list of all the customers in Quickbooks

- You can uncheck any customers in the list that you do not want to import into FastManager at this time
- Click on Run to begin the import
- you will be prompted with the option to also import any balances that the customer/s have in Quickbooks
In the future, as new customers are added to FastManager, you can export them to Quickbooks in the same way.
Sending Invoices
Click on Export → Invoices
- Select the invoices that you want to send.
- Click on the Run button to start exporting Invoices
If you want to control the application of payments to invoices yourself uncheck the
Apply payments to existing invoices in QuickBooks option on the Payments tab of the Preferences screen.