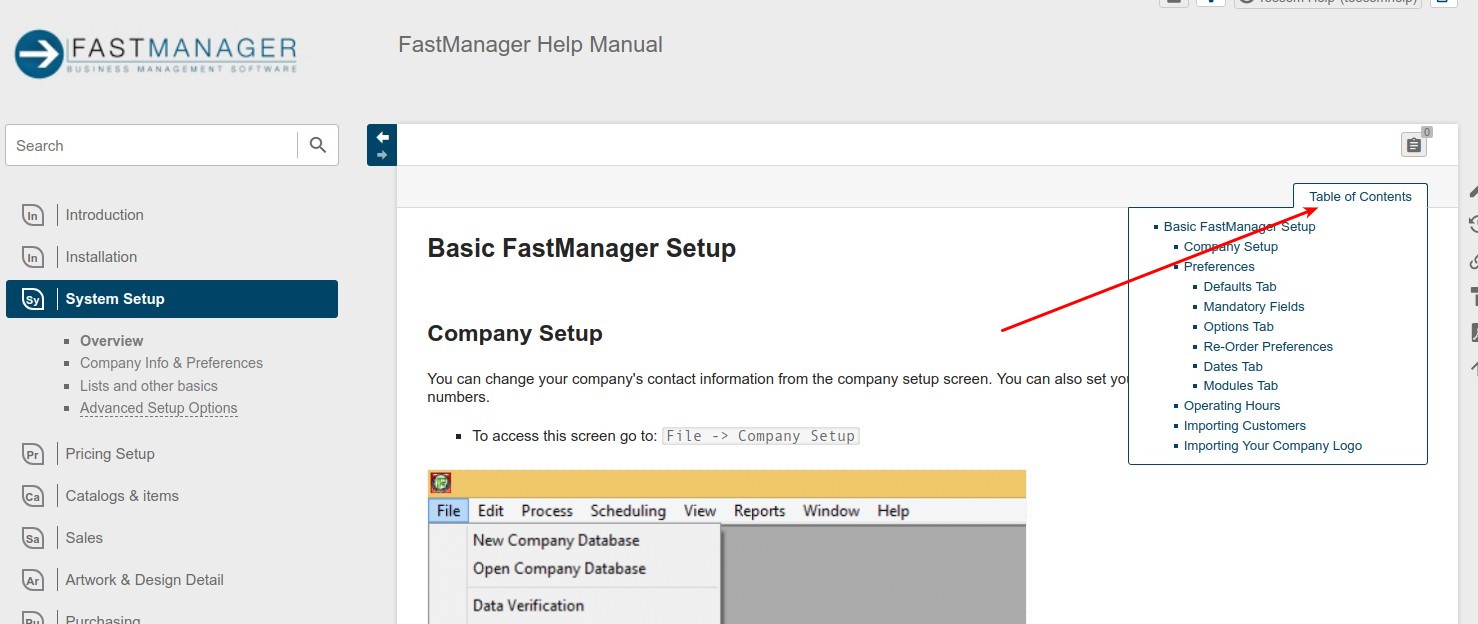
Table of Contents
Company Setup
You can change your company's contact information from the company setup screen. You can also set your initial quotation and invoice sequence numbers.
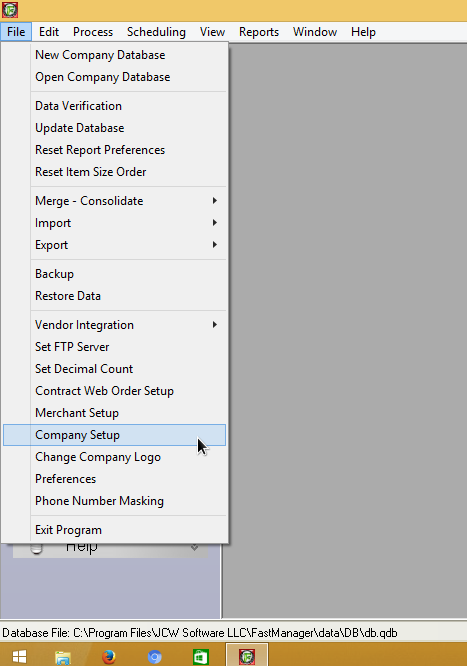
- To access this screen go to:
File -> Company Setup

Make the changes required and click on Save.

The contact information on this screen is what will print on your quotations, work orders, invoices and purchase orders.
Preferences
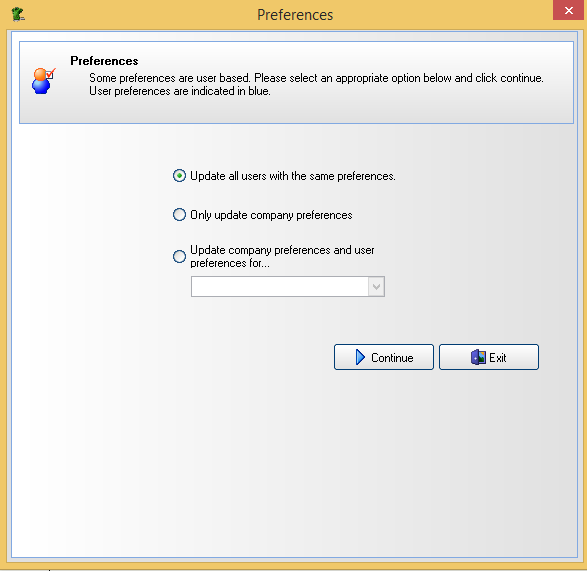
In FastManager, go to File -> Preferences

We recommend that you leave the default: update all users with same preferences selected and click on Continue.
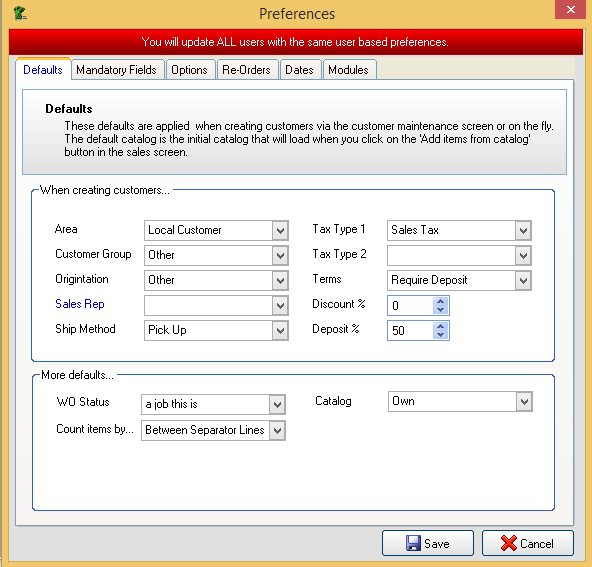
In the next window that comes up, you will notice that you have six tabs that need to be filled out:
Defaults Tab
The first tab is called Defaults.
The “default” tab has basic sales oriented information on the top.
- For instance, when creating customers, what type of area are your customers typically from.
- Or you can set which Rep should be used as the default for new customers on that computer
Fill out each field that is applicable to your company.
- Underneath that section is another section called
More Defaults.- Again, fill out each field making it specialized to your company.
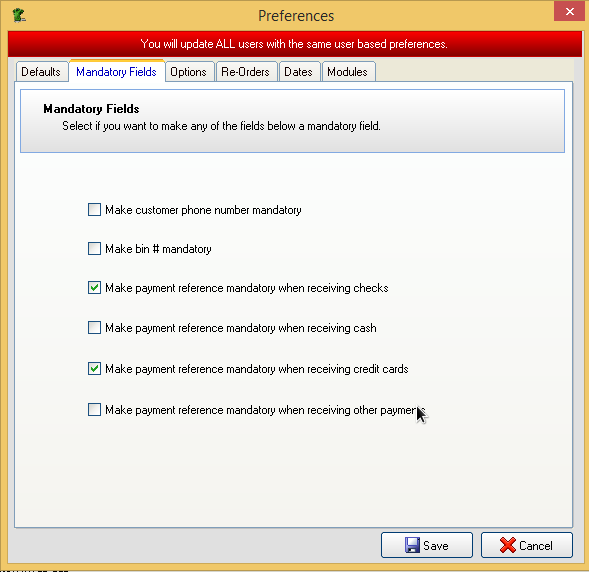
Mandatory Fields
The next tab is called Mandatory Fields.
- Check off whatever boxes make sense for your company inside this field.
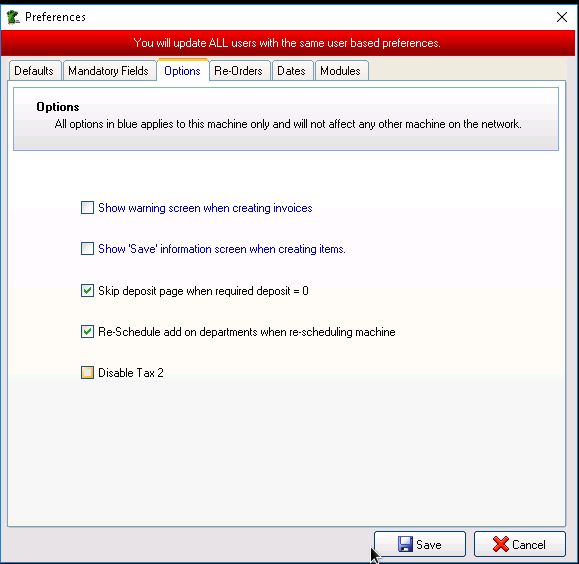
Options Tab
The third tab is called Options.
Repeat the same processes by selecting those things that make sense within your company.
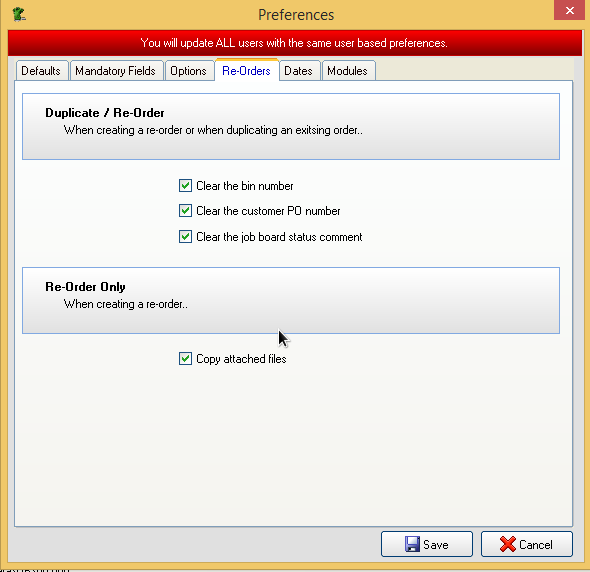
Re-Order Preferences
The fourth tab is called Re-Orders. Check off those things that are applicable.
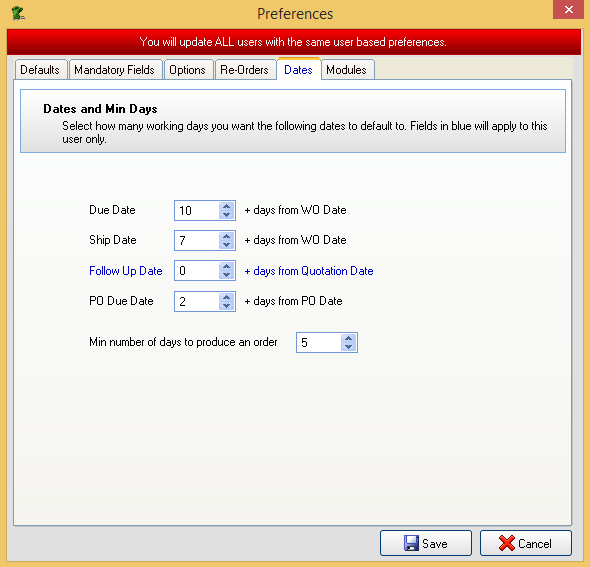
Dates Tab
The fifth tab is called Dates.
Within this tab you will be choosing by default the amount of days it takes to produce orders, the minimum number of days it takes to produce orders and you are going to change your default ship dates, follow-up dates and the default number of days that you expect to receive goods on a PO.
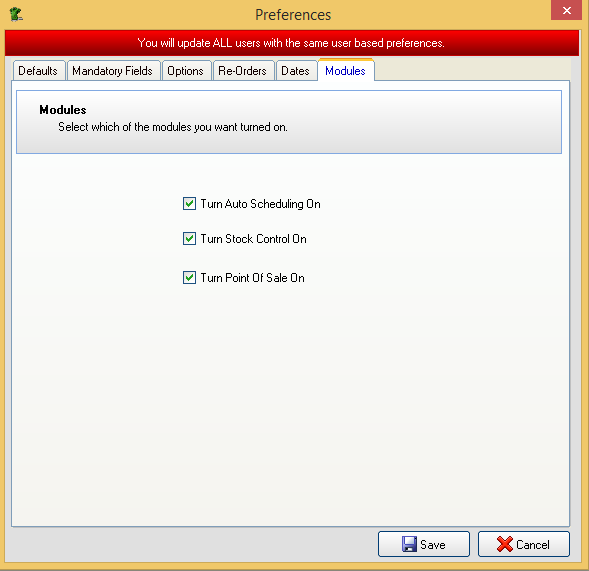
Modules Tab
The sixth and final tab is where you would turn on certain Modules.
The modules available are: Auto Scheduling and Stock Control
- If the option is greyed out, then this means that it is not enabled in your Serial Number
- Should you wish to take advantage of one of these advanced features, contact our Sales department to upgrade your license!
Check the box next to each Module that you would like to have enabled
Click Save when you are done.
Operating Hours
You can define the total number of hours on each given day of the week that your production floor is open to run jobs
Operating Hours will only affect AutoScheduling
To set your operating hours, go to Scheduling -> Operating Hours

You will enter your “production work hours” for each day of the week.
If you work 8 hours Monday through Friday than you will put 8 in each data field Monday through Friday.
Within this window you will also set-up the exceptions.
Fast Manager uses the term “exceptions” because it does not only apply to holidays but also to days that you work longer than your typical shift.
- For instance, if you click the
Addbutton, you can select a date, let’s use Christmas as an example, navigate toDecember 25on the calendar drop down, click the 25th of December, enter in0 hoursbecause you will be working 0 hours on Christmas and under the comment field, you can type Christmas Day.
- Click Update and you have now added Christmas as an exception with 0 hours.
- If you know that every day before Christmas you are going to work a double shift, you can click the word
Addagain, select the date from the calendar drop down to December 24, put in16for the hours, and put under the comment field, day before Christmas. ClickUpdate.
- You have now added an extended work shift.
Importing Customers
There are 2 ways you can import customers in FastManager:
- You can import customers from QuickBooks. Click here for more information.
- You can also import customers using a CSV file:
- The CSV file must be organized EXACTLY in a specific manner in order to accurately transfer the data across.
- Make sure your CSV file has the same headings as our sample template and in the same order.
- Even if some of the columns are empty, that is ok.
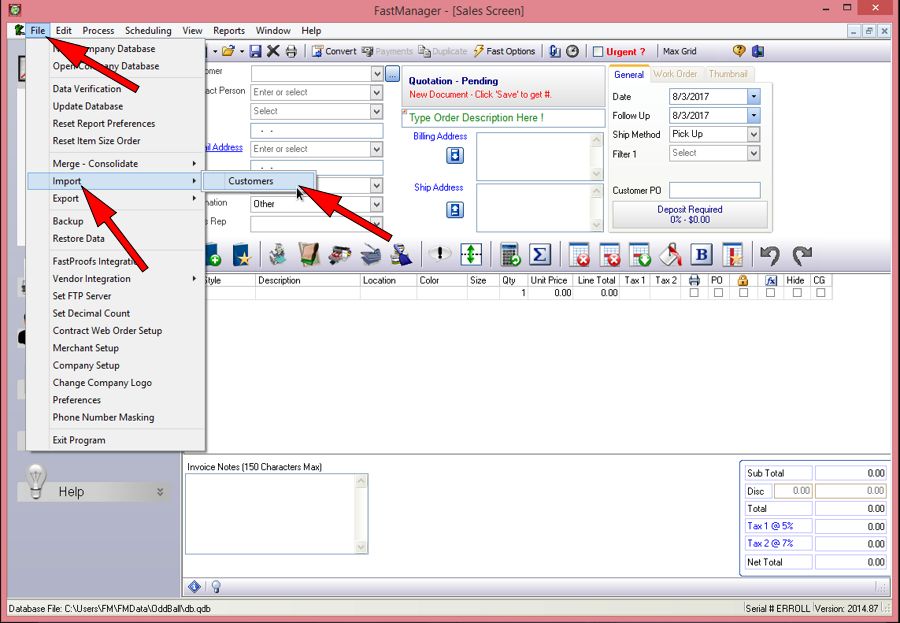
- Once you create this CSV file you can then import it into FastManager by going to:
File -> Import -> Customers
In FastManager, go to File -> Import -> Customers
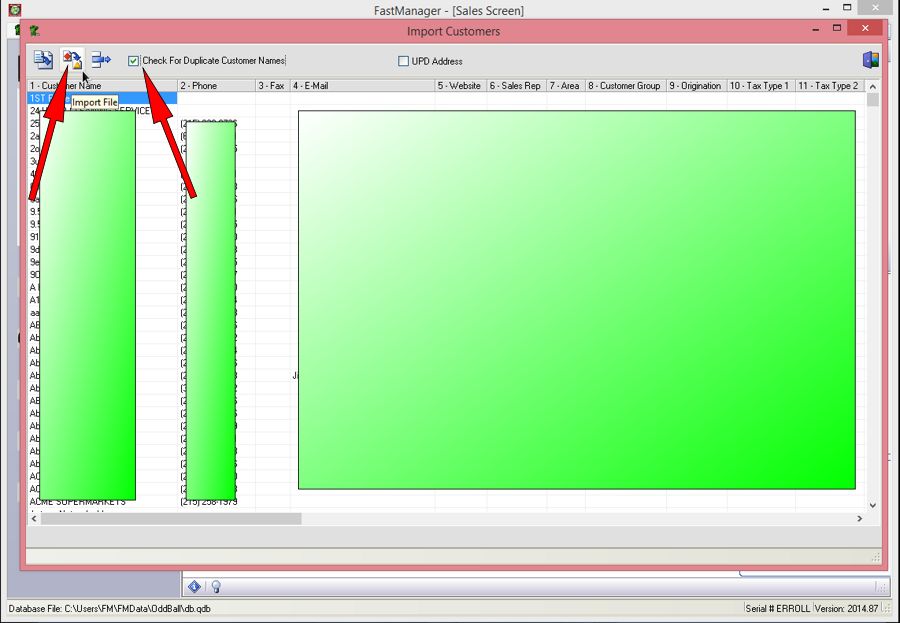
When inside this window first click the get CSV file icon at the top left corner.
Navigate to where the CSV file is on your hard drive and double-click the file to open it.

Select the check for duplicate customer names box which will find duplicate customers, if required.
You can then delete out certain rows, should you wish not to import certain customers, by selecting the rows that you want to delete and clicking the delete this row icon at the upper left.
After you have your customer list accurate you can then select the Import File icon at the upper left
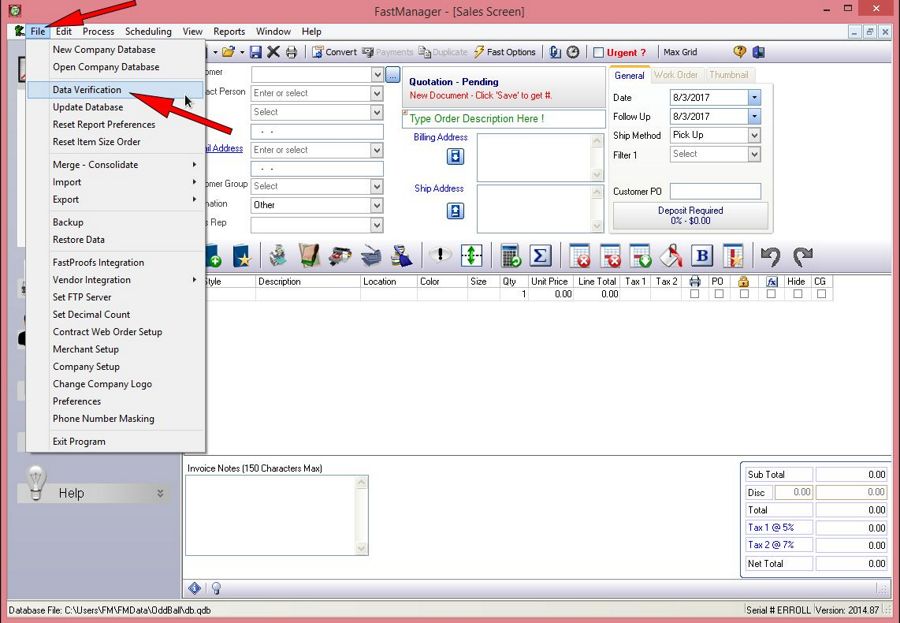
After the import is complete, there is just one more step required to fix any the “NULL Values” that might have been created in the database due to empty cells or columns:
- Go to
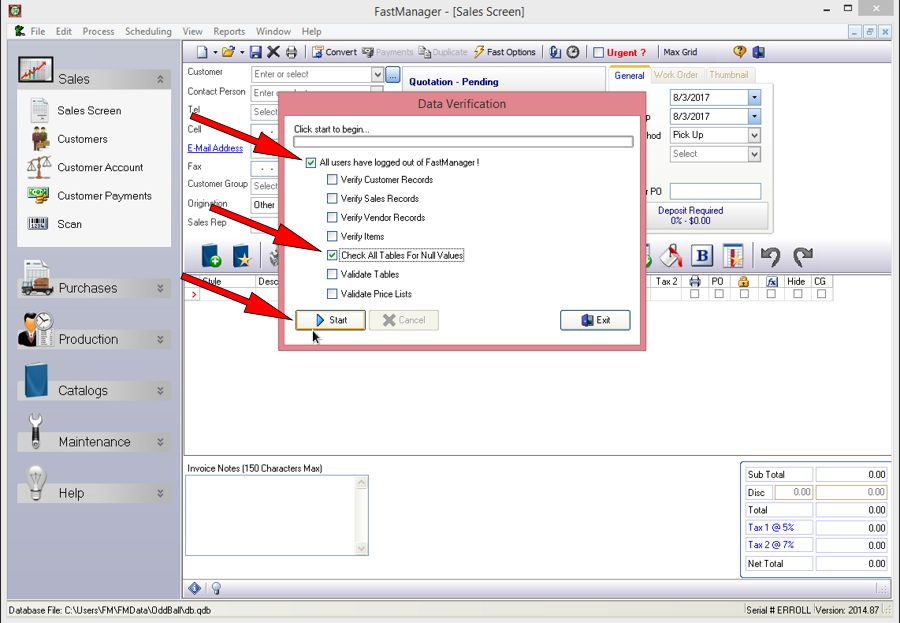
File -> Data Verification - Select:
Check all tables for Null Values - Check the box to confirm that all the other users have closed FastManager
- Click on Start
Importing Your Company Logo
To substitute your company logo, select Change Company Logo from the File drop down menu.
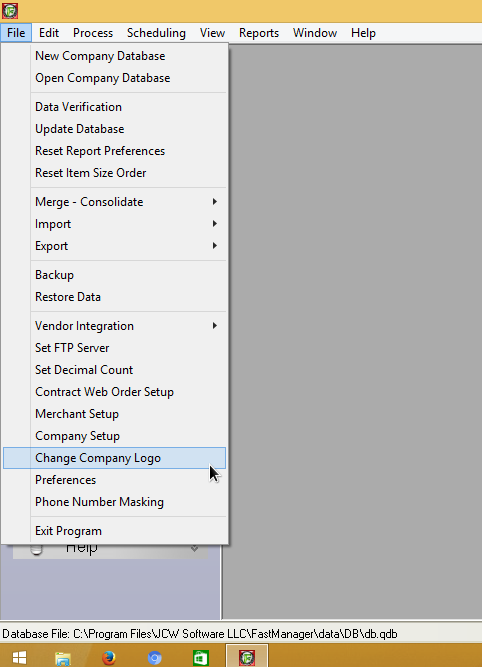
Select which form you want to change the logo on. You can also select to change the logo on all forms.
Click on the Load Picture button and browse to your company logo.
You will see a preview of your logo.
Click on the Save button to tell FastManager where you want to save the modified logo.
In the file browser windows that pops up, be sure to first go to
Network, and from there to the computer/shared folder where you want to store the logo (of course the existing “FastManager Data Folder” is the best logical place)
For example:
Network -> computer-name -> fastmanager-data-folder -> mylogo.bmp
You can now close the Change Picture window, the logo has been saved.
Users
You can create an unlimited number of users in FastManager. There are 2 basic purposes to create user accounts:
- User Access and User Preferences
- Sales Commissions
User Access and User Preferences
- When you first log into FastManager you need to log in with your user name and password. By doing so, FastManager will, based on that user's security settings, prevent him/her from accessing certain parts of the program.
- FastManager will also know certain preferences of the logged in user, such as the default E-mail account when sending out E-mails etc.
Sales Commissions
- FastManager has a 'Commissions Report' which shows the total “commission-payable” sales totals for each rep
- If the
Sales Repoption is turned on, that user can be linked to sales orders and you can filter any of your sales reports by that user.
Adding Users
To create a new or edit an existing user, select Users from the Edit menu
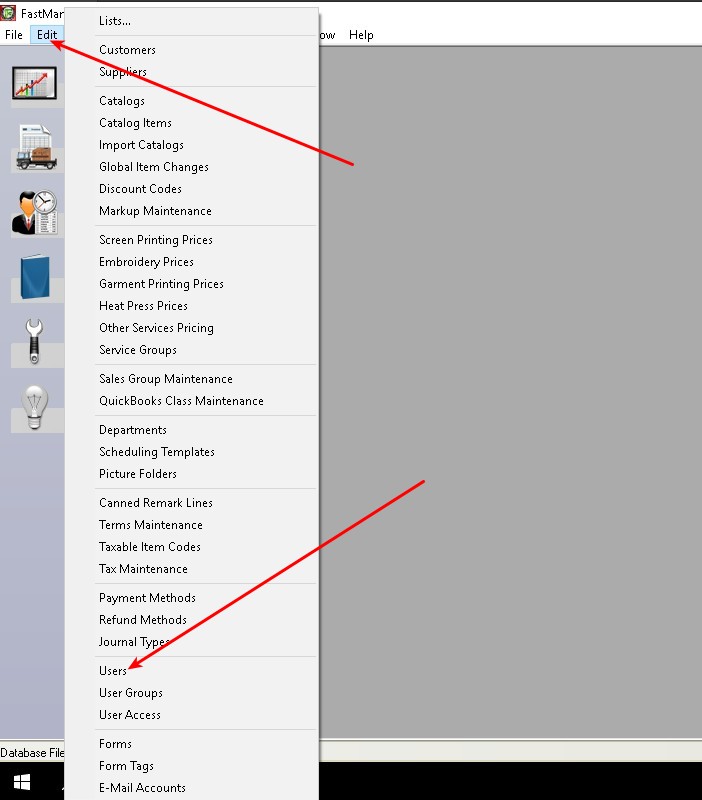
To edit or delete an existing user, click on Open to open that user's record first.
To create a new record click on New.
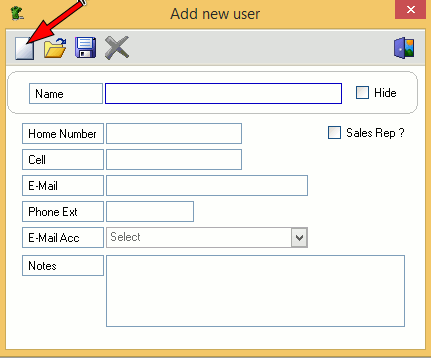
Remember to Save to commit your changes.
- If you have any quotations, or other transactions linked to a user, you will not be able to delete that user.
- You can hide the user instead (check the
Hidecheckbox).
- It is important to check the
Sales Repcheck box if you want this user's name to appear in the Sales Rep drop down list in the sales screen.
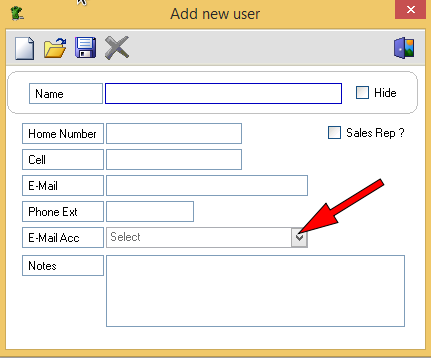
- You can assign a default E-mail account to a user.
- This way if a user is logged in and trying to send an E-Mail the selected E-mail account will be a default to the one you specify here.
You can do this at: Edit -> Email Accounts. See Email Setup for more info.
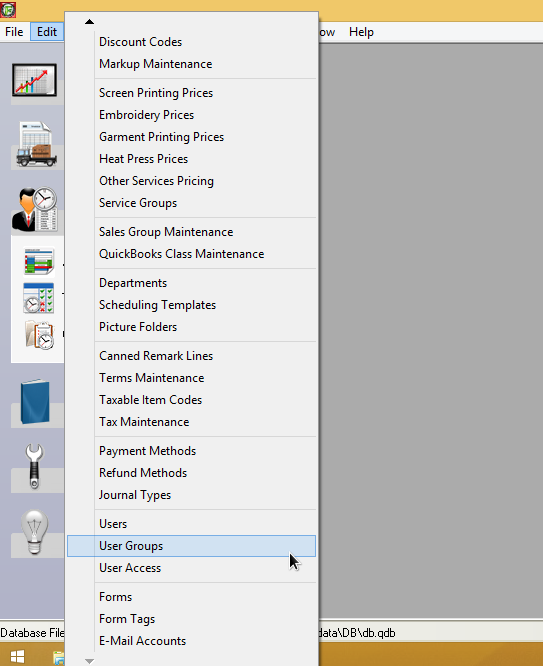
User Groups
You can restrict users from editing or viewing certain information.
Instead of creating a new set of user access parameters for every user you can simply create one for a group of users such as sales reps. You can then assign the relevant user to that access group.
From the Edit menu select User Groups:
To add a new user group, click on the New button.
To edit an existing user group, select the group from the drop down list.
- (In this example we selected the
Sales Repgroup from the drop down list)

You can now scroll down the list and check or un-check any of the restriction options available and then click on the Save button
- Now all we need to do is assign our user to this group.
- You will do this from the
User Accessscreen:
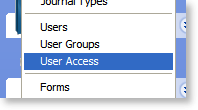
User Access
From the Edit menu, select User Access
Select the relevant user from the drop down list.
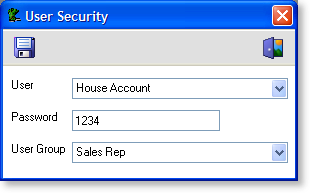
- Enter a password for that user.
- Select the user group you want to assign to them from the drop down list (In our case we will select
Sales Rep) - Click on the
Savebutton. - This user is now assigned to the 'Sales Rep' group which means he/she will have the same access rights as any other user who is assigned to this group.
- This user will now also need to enter the assigned password to login to FastManager.
E-mail setup
You can E-Mail quotations, sales orders, invoices, customer proofs and many other documents directly from FastManager.
- Before you can do that, you need to create your outgoing E-Mail accounts.
- You can create an unlimited number of outgoing E-Mail accounts, this way you can send documents from various people.
- For example you can create an account to send invoices from your accounting department and you can create an account to send quotations from sales.
- Creating these accounts are very similar to any other E-Mail program.
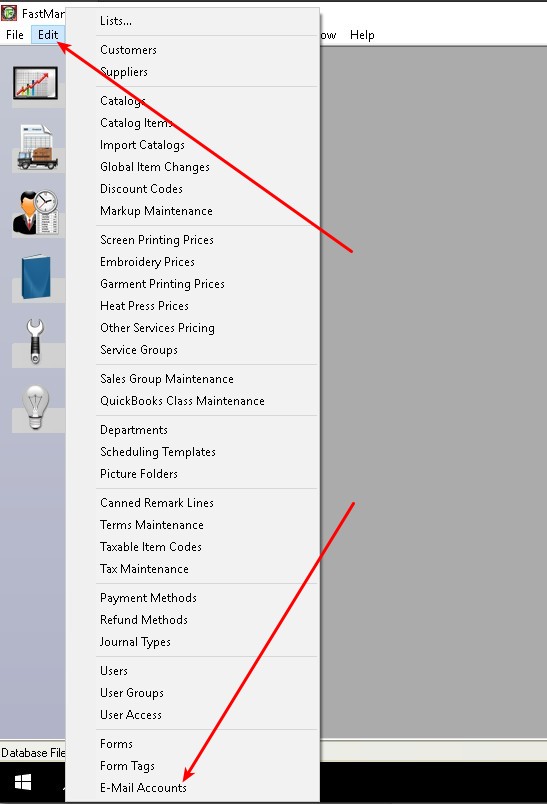
In FastManager, go to Edit -> E-Mail Accounts (it's the very last option on the Edit drop-down menu):
To edit an existing account, first click on the Open button to view a list of the available accounts, then double-click on the one you want to edit.
- You can also delete any account from this list by selecting it and clicking on the Delete button (the red
X)
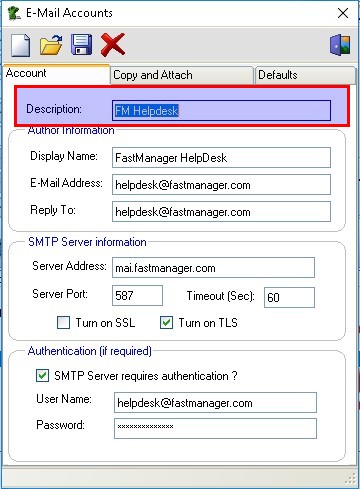
To create a new account click on the New button.

You will need to obtain the following information:
| Required Info | Example |
|---|---|
| The email address you want to send from | myname@mydomain.com |
| The outgoing (SMTP) server address | smtp.mydomain.com |
| The encryption protocol to use | SSL or TLS or None |
| The port number to use | 465 or 587 or 25 |
| The SMTP username | myname@mydomain.com |
| The SMTP password | My5up3r53cr3t |
Enter the following information:
- a user friendly description. This can be anything that will enable you to identify the account when you need to select which account you are sending from.
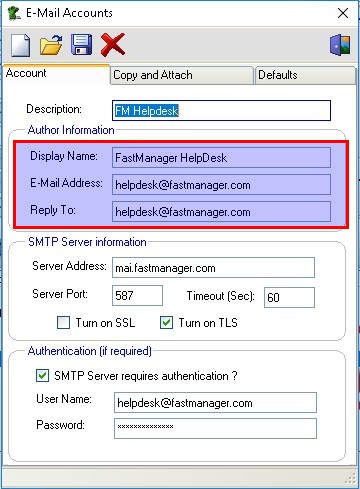
- the Author Information. This would be the display name, which is what your customer will see when he receives the E-Mail,
- the E-Mail address that you are sending it from as well as the address you want your customer to reply to.
- the outgoing
SMTP Serverinformation. (You can get this information from your ISP or Hosting company.)
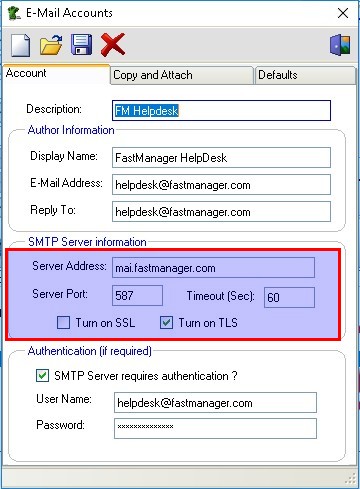
SMTP server & port settings from that setup
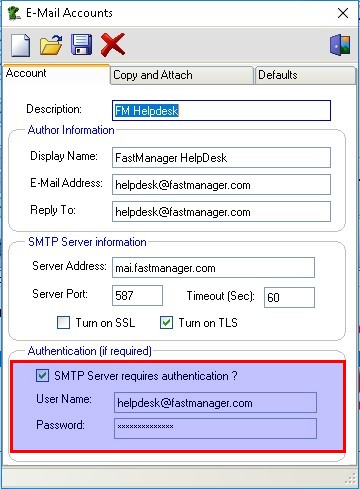
Confirm if your SMTP server requires authentication (it probably does) and what the user name and password will be:
GMAIL
Office365
The Office365 SMTP settings are as follows:
| SMTP Server Information | |
|---|---|
| SMTP Server Address: | smtp.office365.com |
| SMTP Port Number: | 587 |
| Encryption Type: | TLS |

FastManager does not keep record of any E-Mails you send. You can however blind copy yourself (or anyone) on every E-Mail.
- this way you will have a copy of every E-Mail in your favorite E-Mail application.
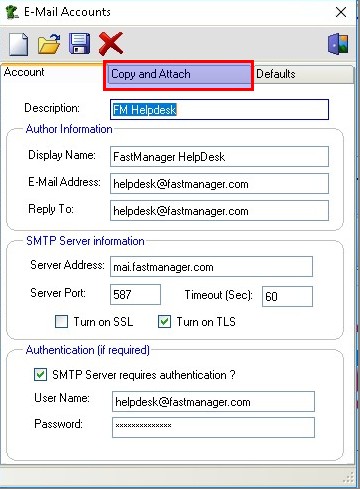
- Click on the
Copy and Attachtab at the top of the screen.
You can add as many addresses as you want in the BCC section. Simply click on the Add button to add another address.
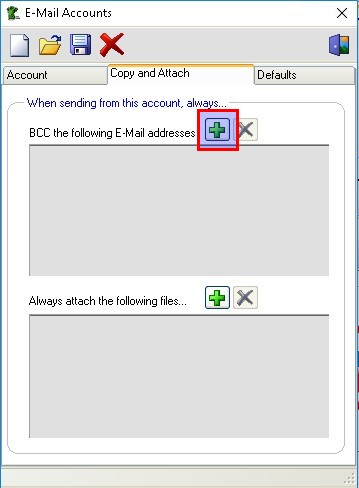
To delete an E-Mail address from the list, select the address you want to delete and click on the Delete button.
You can also have FastManager automatically attach any files by default.
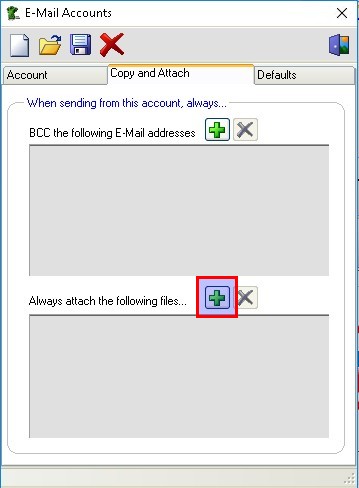
For example, if I'm going to send quotations from my Sales account I would by default want to attach our company's terms and conditions to the E-Mail.
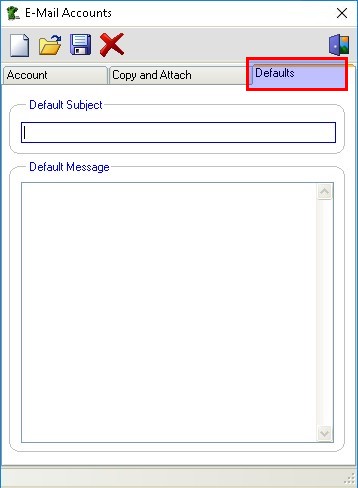
Email Defaults
You can also setup a default signature and and subject when selecting the account.
- Click on the
DefaultsTab:
Once you are ready, click on the Save button to commit your changes.
Now you will be able to select this email account to send from, and you may allocate it to a particular user or rep.