meta data for this page
- en
Print & Email
Printable Documents
On the Sales Screen, when you click on the Print button, you are presented with several options.
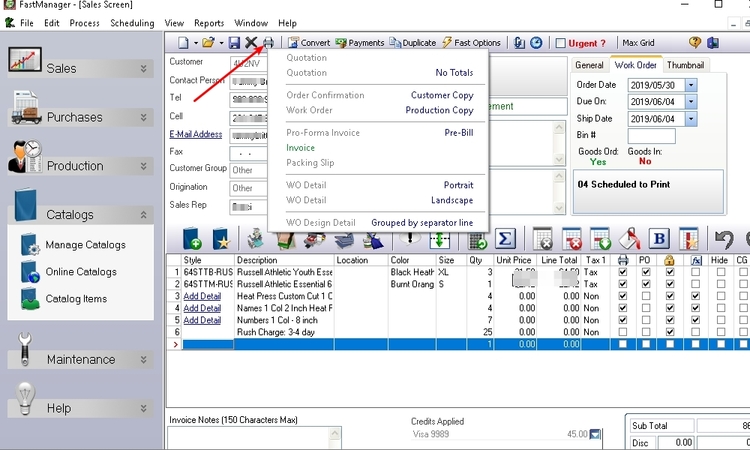
Quotation
This will print the quotation layout.
- If you have a discount amount at then FastManager will select the layout called
Quotations - With Discount - If the discount amount =
zerothen FastManager will select the layoutQuotations - No Discount
Quotation - No Totals
This option will print a quotation without any totals at the bottom.
- This option is handy if your customer needs to choose between several options.
Work Order - Customer Copy
This option will print the Sales Order copy.
- Which you can give to your customer once you have converted the quotation to a work order.
- Important fields on this document includes, the order 'Due Date' and any deposits they paid showing the balance due when the will collect.
Work Order - Production Copy
This option is intended for your production.
- Any remark lines that was marked not print, will print on this document as it is intended for production.
- This layout will not show any pricing information.
- It is intended for a job packet at the beginning stage of the order giving your production a basic overview of what is coming, before you have the exact artwork information.
Invoice - Pro-Forma
Some bigger corporations request that you send them a pro-forma invoice in order cut a check while you are still producing the order.
- This document is really nothing other than the quotation with a header change.
Invoice
This will be the actual invoice that you can send to your customer.
- It will also show any payment applied to the invoice as well as the balance due.
- You can print another copy of the invoice and send it to your customer once the invoice is paid.
- The invoice will be “Stamped” as
Paidand can act as a payment receipt to your customer.
Packing Slip
This is a basic list of of all the items you are sending
WO Detail - Portrait
You can print this out for production which will show all the design detail including thumbnail and colors.
- This can be added to the Job Bag at a later stage once you have all the art requirements and other instructions confirmed for production to continue.
WO Detail - Landscape
This option is exactly the same as above, but is in landscape format and includes more detailed information such as mesh counts etc.
WO Design Detail
This option will print a list of the garments with the linked embellishment and it's detail below the list of garments.
- It will also print a new page for every separator group. This way it keeps the garments associated with its embellishment.
- For example: FastManager will print 2 pages if you have an order with polo shirts with embroidery on the front and printing on the back and then you also have some caps with embroidery on it.
- The first page will show the polos and below you will the see the detail for the front embroidery as well as the back print. On the second page you will only see the caps listed with the design detail of the embroidery.
- The design detail will include everything from location, size of embellishment, mesh counts, thread colors, additional notes etc etc .
- This is a very comprehensive report and should be added to the job pack once you have all the art detail confirmed.
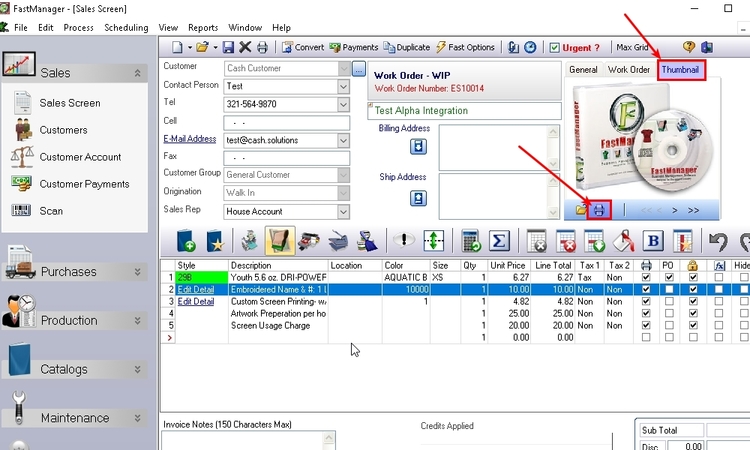
Art Approval
The Art Approval form can be printed from the Thumbnail tab at the top-right of the Sales Screen:
Print Options
FastManager will first open the document in a print preview screen.
- From there you can select if you want to print to a printer or E-Mail the document to your customer or any other E-Mail address.
- Some documents may also be exported to
PDFformat.
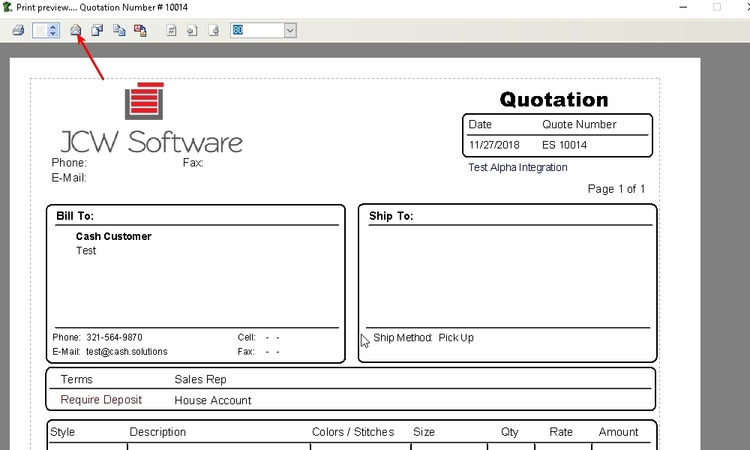
Most of the print options will be disabled if you have made any changes to your sales screen.You need to Save first before you can continue.
Some options may be disabled based on the current status of your order. For example:
- If the current status is
Work-In-Progress(“WIP”) you will not be able to print anInvoice.
Sending Email
Sending A Normal Email
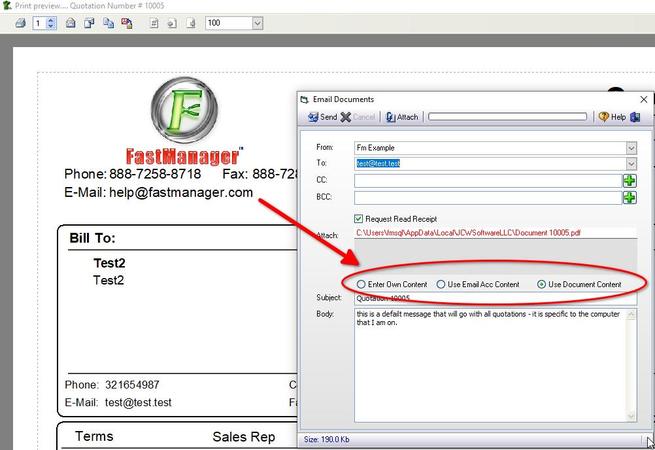
From the Print Preview screen, click on the Email icon
If you have properly configured an email account for your user, it will show up as the default account to send from.
- alternatively, you can select any account to send through, from the drop-down selector:
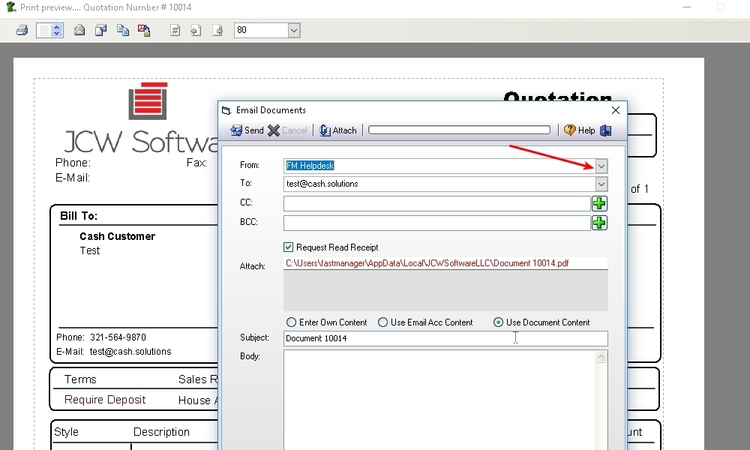
Go to
Edit → Email accounts to create the email account- See: Setting up email
Then go to Edit → Users to link the email account to your Username.
- See: Adding Users
Click on Send to send the email, it may take a minute, you will see a confirmation message once the message is sent.
Email Subject Setup
In your email account setup, you can configure a Default subject + message for yourself. However, on the Print Preview screen you can also setup specific overrides when sending a particular document.
Click on Email Subject Setup:

Select the document to setup an override for from the drop-down selector:
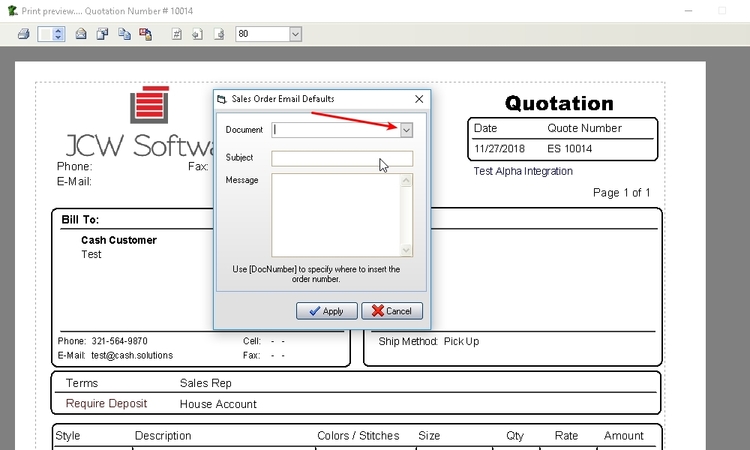
[DocNumber] to dynamically insert the document number
Troubleshooting
If you see the message:
Error while sending message - message not sent!
it most likely means that there is something wrong in your email account setup.
Go back to Edit -> Email Accounts and double-check the settings for the account you are trying to send through.