meta data for this page
- en
Managing Customers
- However you may want to record more detail on your customer, or even have to update address changes etc for an existing customer.
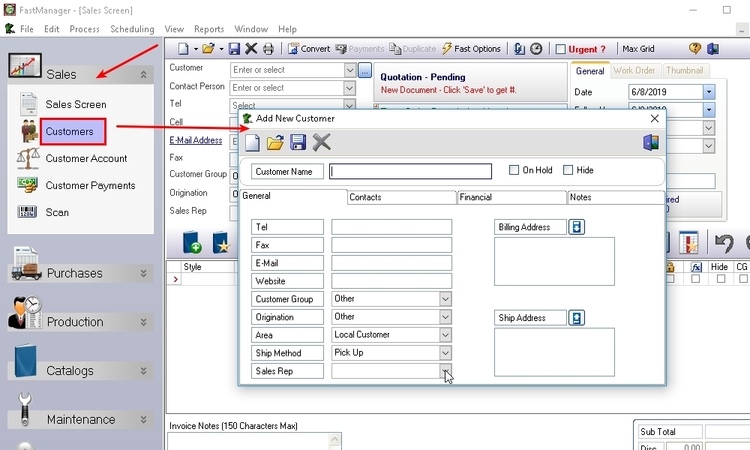
To maintain and update customer information, expand the section: Sales on the navigation pane and click on: Customers
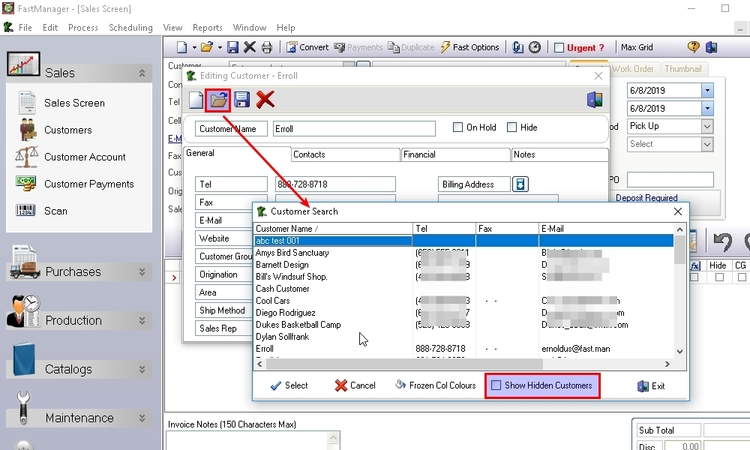
To edit or delete and existing customer, you need to open the customer record first by clicking on the Open icon.
- If the customer you are trying to open a hidden customer, then you need to check the
Show Hidden Customersoption from the search screen.
The customer maintenance screen has 4 tabs:
General
On this tab you will update general contact and grouping information.
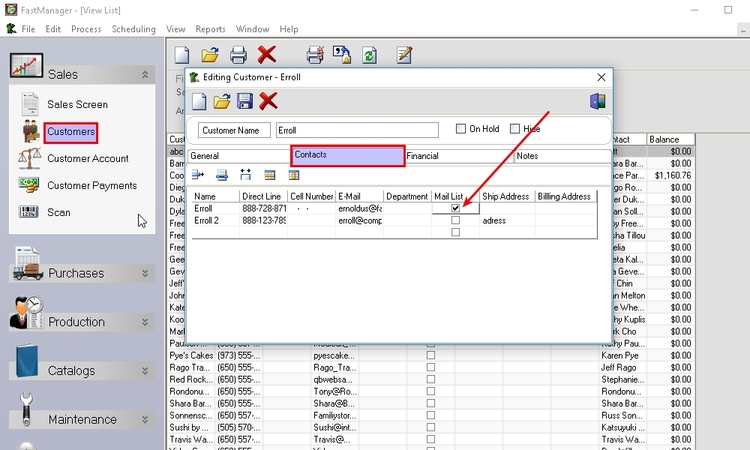
Contacts
FastManager allows you to have an unlimited number of contact persons linked to a customer. Each contact person can also have it's own shipping and billing address.
- To add a new contact person simply enter the person's first name in the last open row of the list:

- To edit the shipping and billing address you need to click on the small Edit
buttonwhich will appear as soon as your cursor enters the relevant cell:

- To delete a contact, click on the contact name and then click on 'Delete Row':

Financial Tab:
Here you would assign default financial information for your customer.
- You can also tell FastManager what this customer's account number in QuickBooks is.
The contact name and phone number on this tab is what will appear in collection reports.
Notes Tab:
Here you can enter important notes about a customer.
- The pop-up notes will appear every time you select the customer in the sales screen.
Example:
Open - simply immediately start typing the name of the Customer you're after. FastManager will drill-down to whatever you type
About Hiding Customers:
If the customer no longer exists you need to hide the customer.
If you mark a Customer as Hidden, you will no longer see them in other screens.
In order to see this customer again, you will need to open the customer from the customer maintenance screen by clicking on the Open button, then check the
Show hidden customers check box and un-hide the customer.
Printing Mailing Labels
You can print mailing labels from FastManager.
- You will need a label printer in order to print address labels.
- We have tested the label printing using a Dymo Labelwriter 400 which you can buy at any Staples or Office Depot.
- Before you can print labels you need to set up your label layout.
From the “View” menu, select “Customer List”
- Click on the Print Options button.
- From the Pop-Up menu, first select your label printer.
- Next select your label orientation. In most cases it should be Landscape. It all depends on your label size.
- Next choose a font size
!!! tip First print a single label, to see what it looks like.
You can then go back and change the X and Y position as well as the font size, until you are satisfied with the way your label looks.
- To print a single label Click on any one row in your list of customer below.
- Click on the Print button
- From the Pop-Up menu, select
Print Selected Rows OnlythenMaster Address Only
- This will print the Master Billing Address for the selected customer.
!!! tip To print multiple labels you can select to print all rows or you can select multiple rows by holding down your SHIFT or CTRL key.
Exporting Email addresses
You can export a list of your customers' E-Mail addressess to a CSV spreadsheet.
- From the
Viewmenu, selectCustomer List
- Use the filter options to narrow down the list of customers you want to extract addressess for.
- Click on the
Exportbutton
- Select E-Mail addresses from the pop-up menu
File -> Export -> Customer Mailing List